Waterproofing the bathroom: main types
Content
Due to increased humidity, constant exposure to moisture on the floor, walls and even the ceiling, the bathroom is exposed to various harmful effects. These include the appearance of mold and fungus, the growth of bacteria, which cause an unpleasant odor, as well as the destruction of materials on walls, floors and ceilings, especially if they are made of wood. The absence or poor waterproofing of the bathroom in the apartment can lead to permanent leaks. To avoid unpleasant consequences, it is necessary to correctly and efficiently carry out work on waterproofing the bathroom.
Types of waterproofing
Waterproofing materials are placed between the base of the room’s surfaces and decorative finishes in all areas where contact with water is possible. To determine which waterproofing is best for the bathroom, you need to consider its types.
Okay
This type includes roll or film materials made on the basis of cardboard or synthetic fiber impregnated with bitumen. The roll is cut into separate strips, laid on the surface and heated with a gas burner, after which the material melts, firmly adhering to the floor.
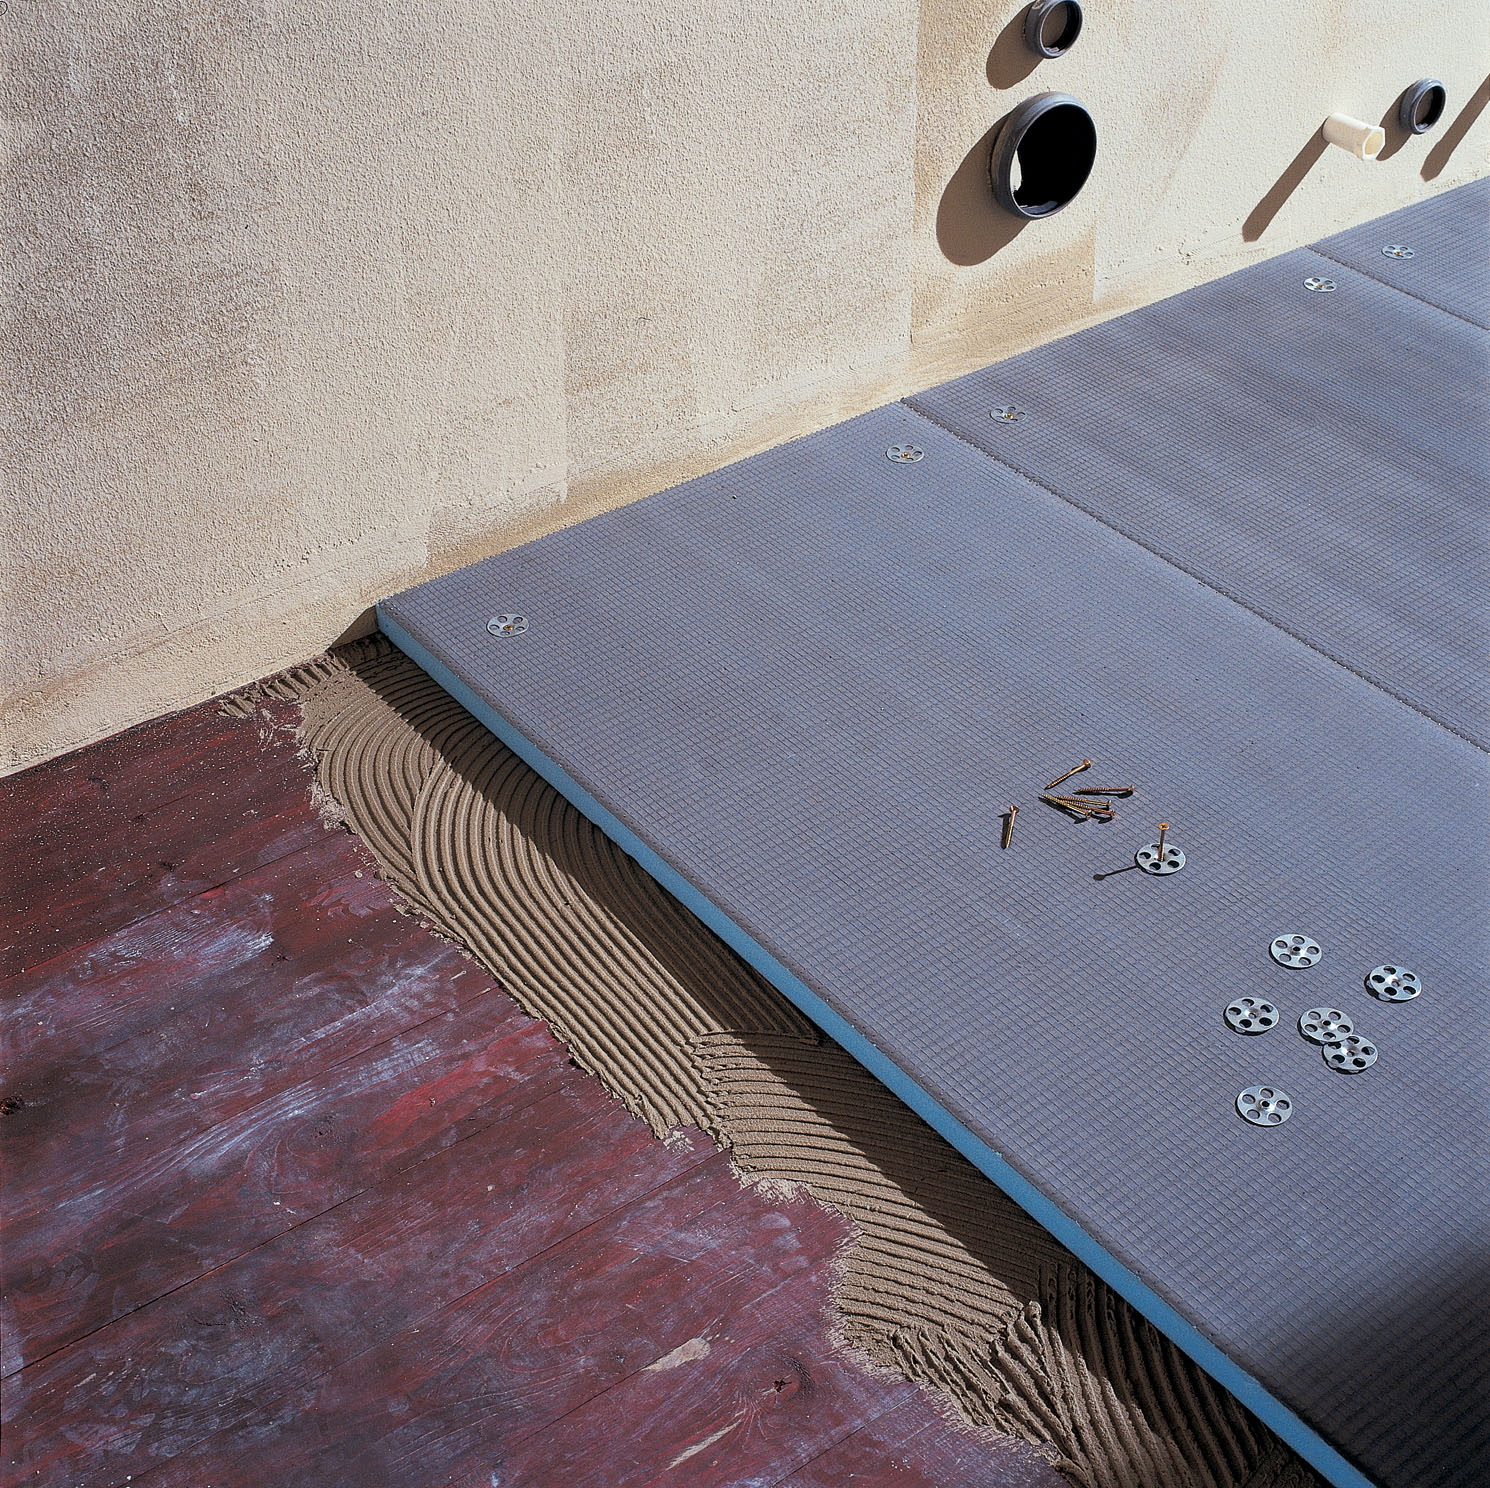
Disadvantages: roll waterproofing is not suitable for use in a small unventilated room, since under such conditions it is impossible to use a gas burner. The joints of the strips must be glued with silicone or polyurethane sealant, otherwise they will leak moisture. Inconvenience when laying.
Advantages: in addition to those materials that need to be heated, there are hydroisols that themselves stick to the surface. Such materials are reliable and easy to use. In addition, roll insulation is cheaper in cost than other types.
Smear
These are thick compositions in the form of a powder, paste, a mixture based on bitumen, sand or cement with the addition of various polymers.
There are two types of lubricants for waterproofing a bathroom: one-component and two-component. The first type contains water and hydroisolate, and the second includes polymeric binders. Two-component waterproofing, in addition to protection against moisture, contains substances that protect the surface from the formation of fungus and mold.
Disadvantages: bituminous mastic may crack due to temperature fluctuations, it also has an unpleasant odor during application. In addition, it is worth noting the long drying time of the waterproofing layer, reaching three days. It is necessary to apply several layers, each of which must dry for at least 6-8 hours.
Advantages: coating waterproofing for the bathroom with various plasticizers and polymers has a composition that penetrates into all cracks and cracks, filling them, protecting against penetration of water. Easy to apply. The adhesion coefficient of the mastic allows you to apply it on hard, flexible surfaces. Lubricants combine well with the "warm floor" system, able to withstand elevated temperatures.
Liquid formulations
Liquid waterproofing for the bathroom is used to cover walls, floors, and ceilings.It is represented by two types: liquid glass and liquid rubber. Liquid glass consists of a solution of potassium and sodium, fills the pores on the surface of concrete or wood, without forming a film. Liquid rubber is a bitumen emulsion diluted with water. Absorbed in the surface of the floor or walls, forms a reliable upper protective layer.
Disadvantages: liquid waterproofing the floor in the bathroom is done only under the screed.
Advantages: liquid waterproofing the bathroom floor is universal in relation to various types of surfaces. This material has a high coefficient of adhesion with various coatings, is resistant to various aggressive environments, can be used to insulate walls or floors where there is constant contact with water.

The right choice of waterproofing material
In order to get high-quality work on applying a moisture-proof coating of a bathroom in a frame house or in an apartment, you need to know which waterproofing to choose for the bathroom and how to properly install it. So, the best waterproofing for the bathroom is selected according to the recommendations:
- To lay the tiles on a concrete base, it is recommended to use a coating mastic. They are easy to use, withstand extreme temperatures, suitable as a base for screed. Lubricants are also best used if the surface area to be treated does not exceed 10 sq.m.
- Liquid rubber is suitable for use in the bathroom, regardless of the finishing material.
- Waterproofing the walls of the bathroom is often carried out using cement-polymer compounds. This material is great for tiling.
- Waterproofing the ceiling in the bathroom, as well as the walls, can be done with liquid glass - this plastic composition forms a thin surface that protects against moisture, fungi, mold, without weighing down the surface of the wall.
- The waterproofing of the bathroom in a wooden house is conveniently carried out using rolled materials, and the protection of floors under the bathroom floor - with the use of coating mastic.
- Waterproofing of drywall in the bathroom is carried out with the use of coating compounds, on top of which tile adhesive and directly the tile itself are applied. Coating mastic is also ideal for coating walls with stucco in the bathroom.
In this case, it is always possible to combine various types of materials. For example, roll waterproofing is used to cover a large surface area of the floor, and coating or liquid insulation is used for the walls of the same bathroom.
Waterproofing
Before waterproofing the bathroom, it is necessary to carefully prepare the room: clean from dust and debris, free from plumbing and furniture. Greasy and oily stains are removed by special means.

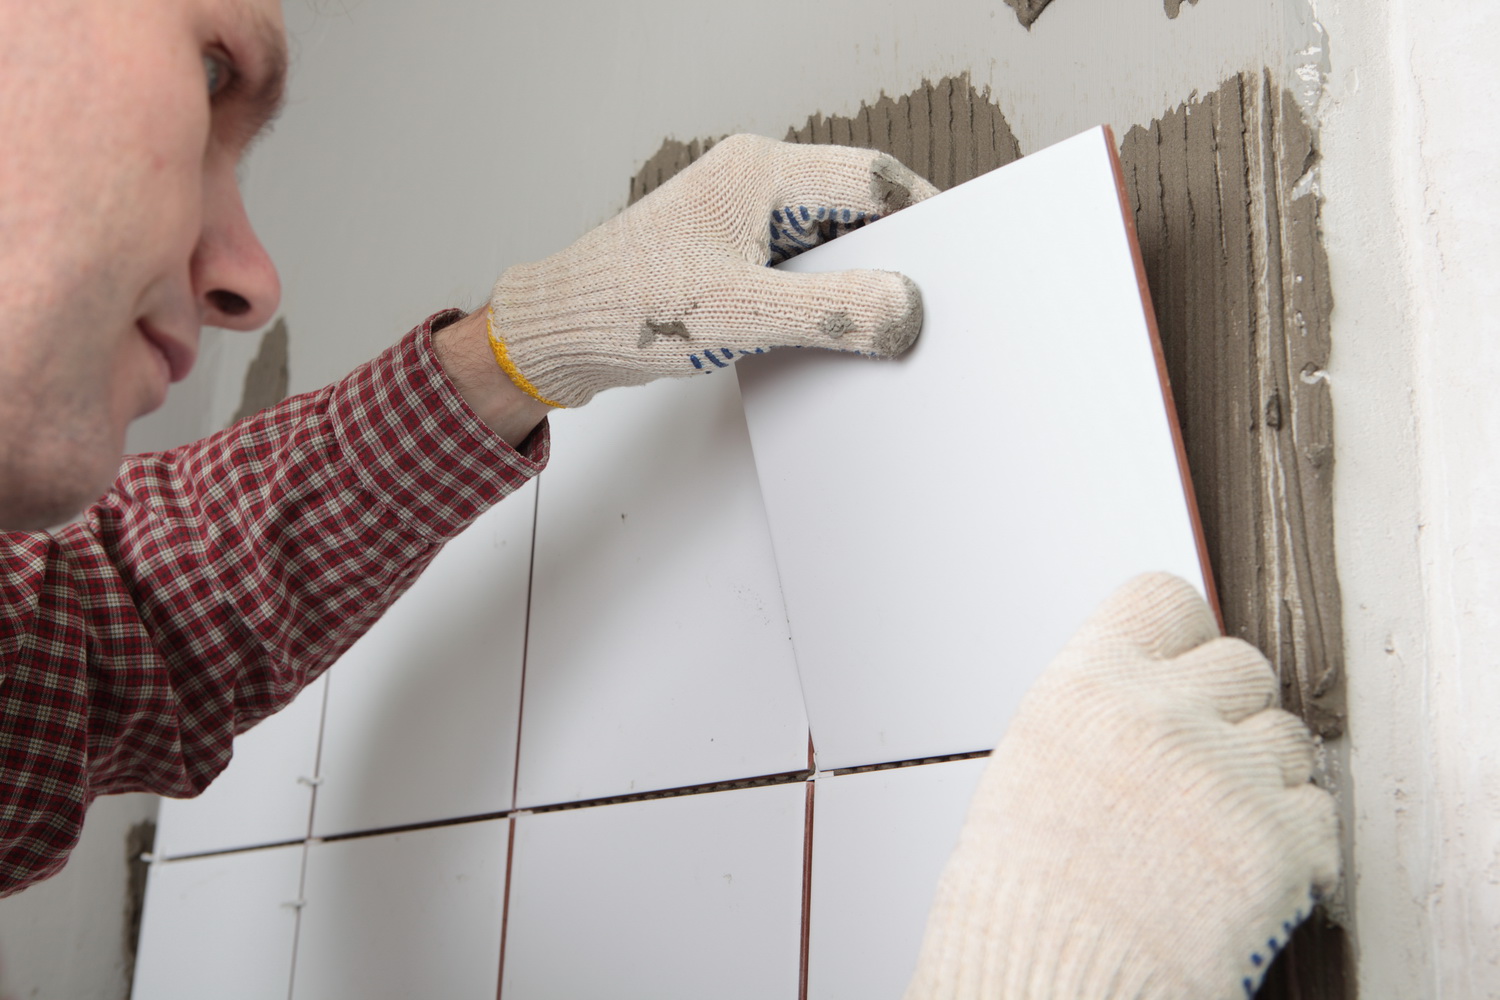
Wall laying
The waterproofing of the walls in the bathroom begins with the removal of the old coating to concrete. Then the work steps should be completed:
- The walls and ceiling in the bathroom are checked for flatness using a level. If there are significant deviations from the level, they must be leveled with plaster.
- Walls, ceiling, all corners are treated with an antiseptic.
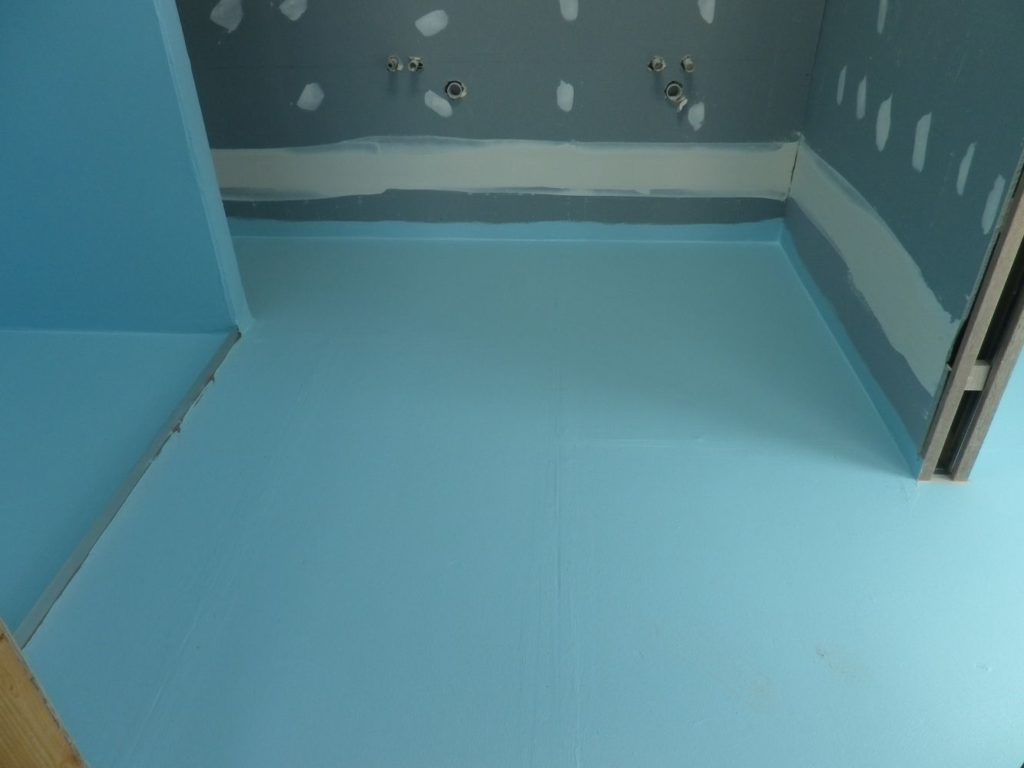
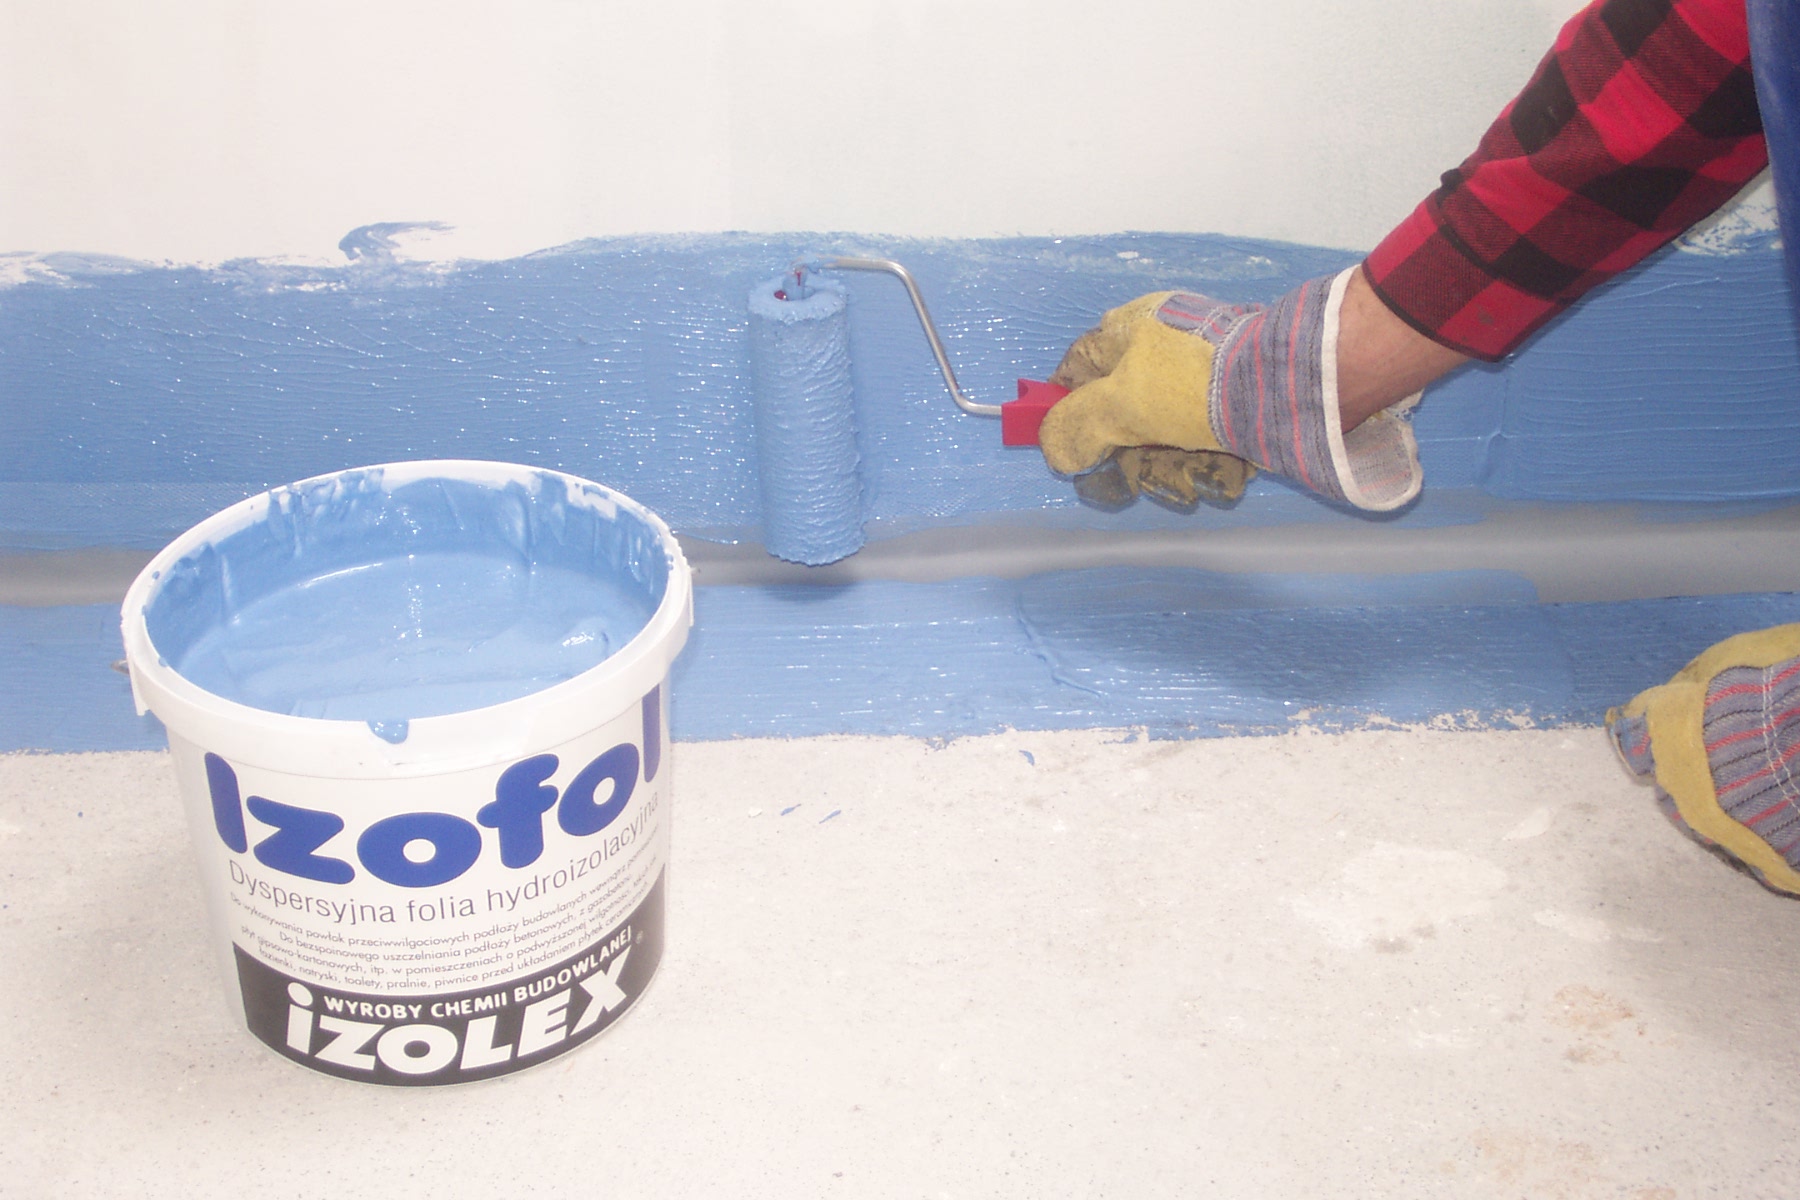
- A waterproofing solution is prepared in strict accordance with the instructions, avoiding the addition of any additional components.
- Waterproofing in the bathroom should be carried out on the walls pre-moistened with water for better adhesion to the mastic.
- Waterproofing is applied to the walls with vertical or horizontal movements with a wide brush, which fits tightly to the surface.
- The walls in the bathroom are covered with a second layer of waterproofing.
Careful sealing should be subjected to the junction of the bath to the wall. Due to the difficult access to them, sealing cords or tapes should be used, which must be laid in the seam between the bathroom and the wall.
After finishing work, to ensure high-quality waterproofing, it is necessary to seal the joints between the tiles with silicone or polyurethane.

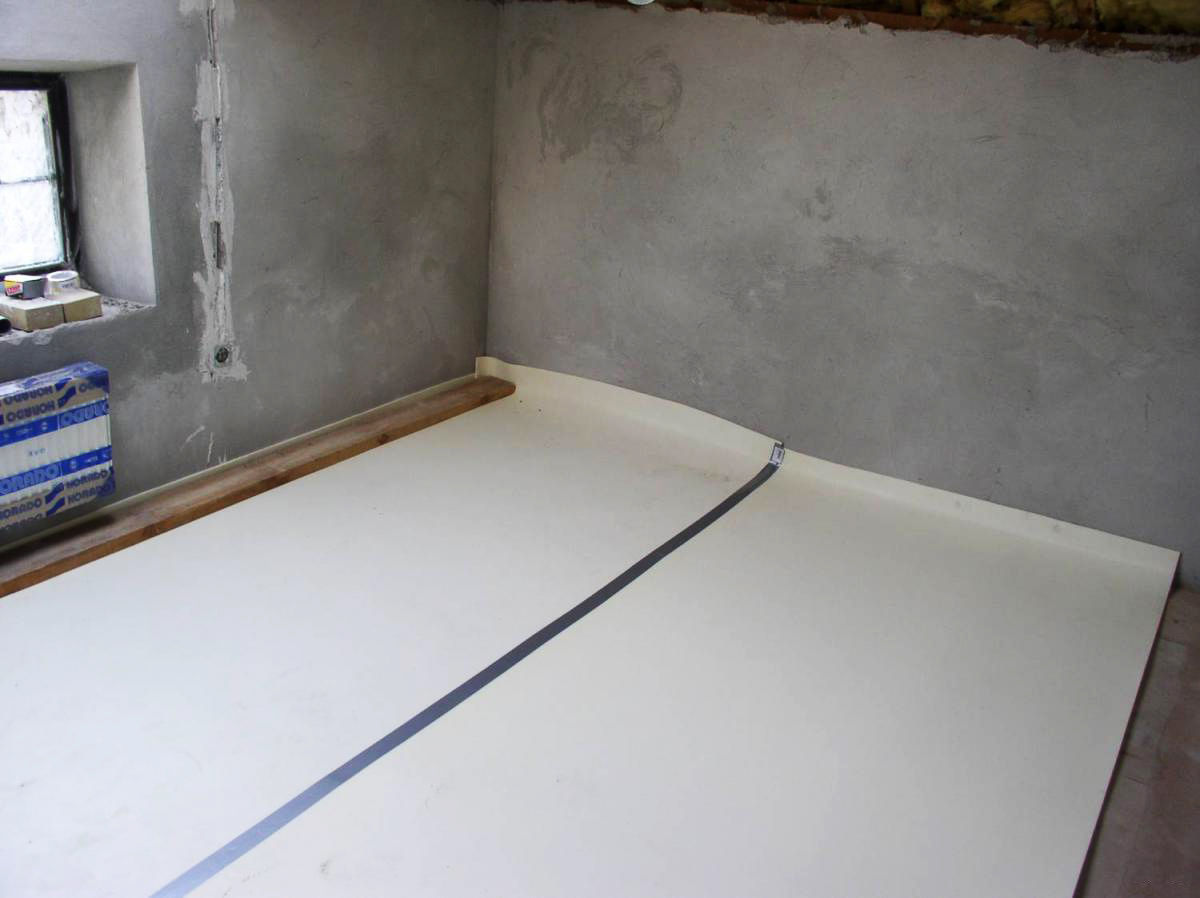
On the floor
The waterproofing of the floor in the bathroom under the tile, similar to the processing of walls, begins with the removal of the old coating to concrete. If the floor is uneven, you need to fill it by level. The following actions are performed:
- A primer mixture is applied to the floor surface using a roller. All inaccessible places (corners, pipe outlets, etc.) are treated with a thick solution with a brush. After drying, another layer is applied.
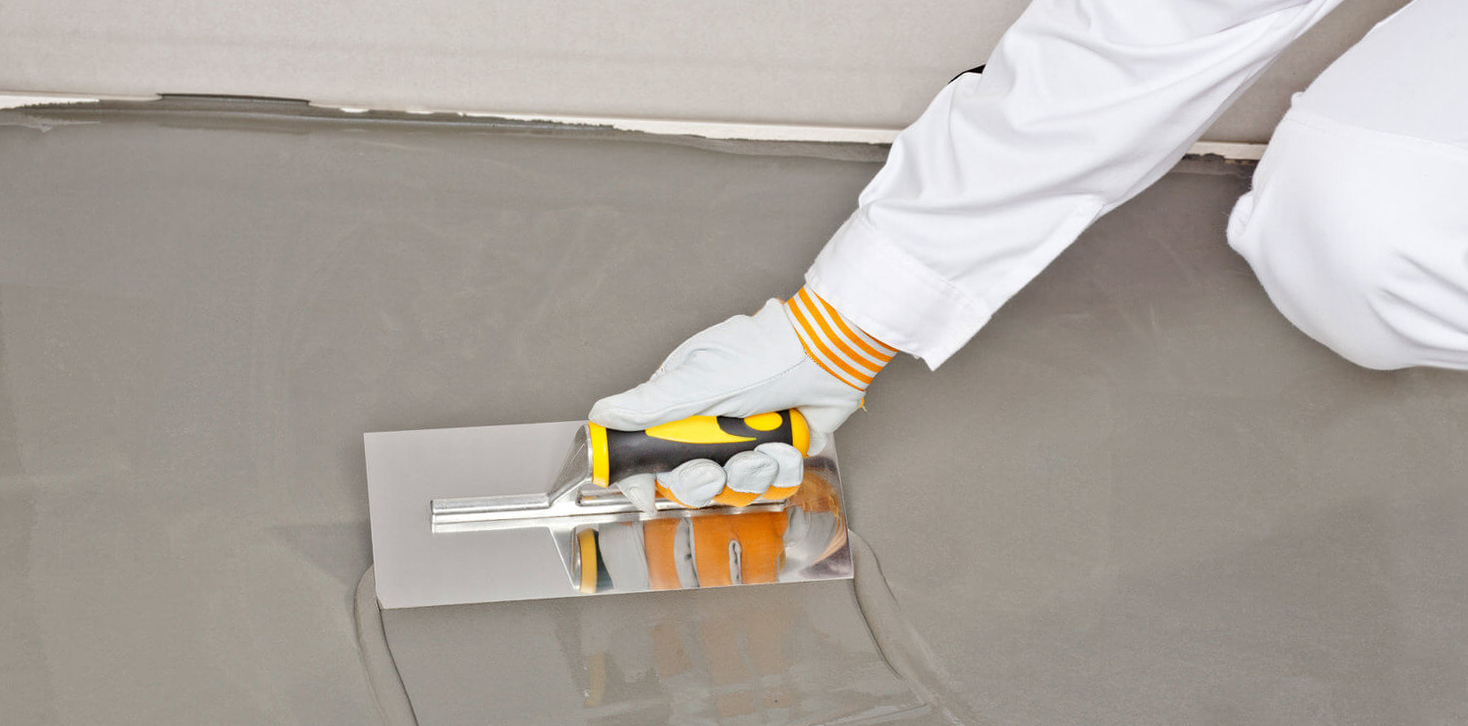
- Then you can start directly the waterproofing device in the bathroom. Processing is done with a wide brush, starting from the corners, joints between the walls and the floor, the places where the pipes exit.
- Until the mastic has dried, a sealing tape is placed on the treated joints. At the same time, you need to ensure that it is without seams, hitches, folds. Docking places should be overlapped with a width of 5-7 mm with obligatory coating with mastic. In the same way, you need to process the corners of each wall to a height of 15-20 cm.
- On top of the tape is laid another layer of polymer waterproofing.
- The waterproofing of the bathroom under the tiles on the floor is laid with a uniform thick layer, which should be two or three. Each of them must dry before laying the next one.
After 24 hours, you can start tiling the floor. After finishing work, it is necessary to process the joints between the tiles with silicone sealant.
In addition to coating mastic, you can use impregnating compounds, for example, to treat the floor with liquid glass. It penetrates into concrete, hardening it and giving water-repellent properties. In order for the composition to crystallize faster, it is necessary to wet the previous one between the application of each layer.

Waterproofing a bathroom in a wooden house
Waterproofing the floor and walls in the bathroom of a wooden house can combine not only the treatment with water-repellent compounds, but also the use of waterproof wood species for decoration.
Waterproofing drywall in the bathroom is not required if you use moisture-resistant material or aqua panels. They do not allow moisture to pass, it is only enough to make the treatment of the joints with sealant or glue.
Waterproofing the bathroom in a private house made of wood is carried out with special care in those places that are subject to constant interaction with water: ceiling, walls above the shower cabin, near the sink, toilet bowl, around the bathtub and the entire surface of the floor. For waterproofing the ceiling, you can use film material or ordinary plastic film attached by a construction stapler, as well as coating mastic. Without fail, vapor barrier material must be attached to the beams above the ceiling.
The waterproofing of the wooden floor in the bathroom is carried out on two levels: on the logs under the rough flooring and under the screed before laying the flooring. Many experts agree that it is better to use rolled material, and treat corners, pipe outlets and sewer holes with a coating compound with a 20-30 cm approach to the walls, treating the edges with sealing tape. The sealing of the joints between the joints of the strips of rolled mastic should be done with glue.
Thus, a well-made waterproofing in the bathroom with your own hands will avoid many problems associated with constant exposure to water and high humidity in the bathroom, and a wide selection of materials will help create a comfortable atmosphere.