How to hang the chandelier on the ceiling yourself: a simple instruction
Content
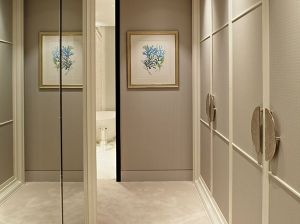
No matter how beautifully the ceiling in the apartment is made, it is the chandelier that gives it the finished look. This is where the question arises, how to hang a chandelier on the ceiling, because this seemingly simple procedure requires taking into account the mass of nuances. Their non-compliance is fraught with the fall of the chandelier and even damage to the ceiling. In this article we will look at how to properly hang a chandelier and how to connect it.

To work, you need the following basic set of tools:
- Drill, and if installed on drywall or suspended ceiling - a puncher with a long drill;
- Screwdriver and indicator;
- Screwdriver;
- Wrenches for assembling a chandelier;
- Hammer to hammer dowels;
- Roulette and marker for marking.
Choosing a mounting method
Before you hang the chandelier to the ceiling, you need to decide on the method of suspension - on the mounting plate or hook. The choice depends on several factors:
- Chandelier designs;
- View of the ceiling.
Most modern fixtures come with a bracket. However, some models of chandeliers, especially European manufacturers, have a design for hanging on a hook, so when buying lighting equipment, this point should be taken into account. Those who previously had a chandelier hanging on a hook often try to buy a chandelier of the same design to facilitate the installation process. In this case, the hook material should be taken into account, since Soviet plastic elements may already be too fragile.
The type of ceiling also affects the preferred mounting method. For example, when working with a concrete ceiling, you can use both the bar and the hook. But hanging it on a suspended ceiling, you can’t do without a hook if you want to do all the work quickly. Again, the design of the equipment should be considered. For example, a round Chinese LED ceiling lamp with a remote control, most often used when working with stretch ceilings, is mounted on a cross-shaped bar.
How to hang a chandelier on a concrete ceiling with a bracket and hook
The concrete ceiling is highly durable, so a chandelier of almost any weight can be suspended on it. The method of fastening depends on what type of fixation is provided by the manufacturer. It is important to immediately determine where the wire passes so as not to damage it. As a rule, the wire is directed perpendicular to the wall with the junction box.
We hang the chandelier on the bracket
First of all, all decorative elements are removed from the chandelier, turn off the light in the room. It is advisable to turn off the light on the shield. The procedure is as follows:
- Marking under the bar. It is advisable to arrange it perpendicular to the cable;
- If the old chandelier was hung on a hook, then it should be bent to the side. It is not worth cutting it, in the future it can come in handy if you decide to change the lamp again;
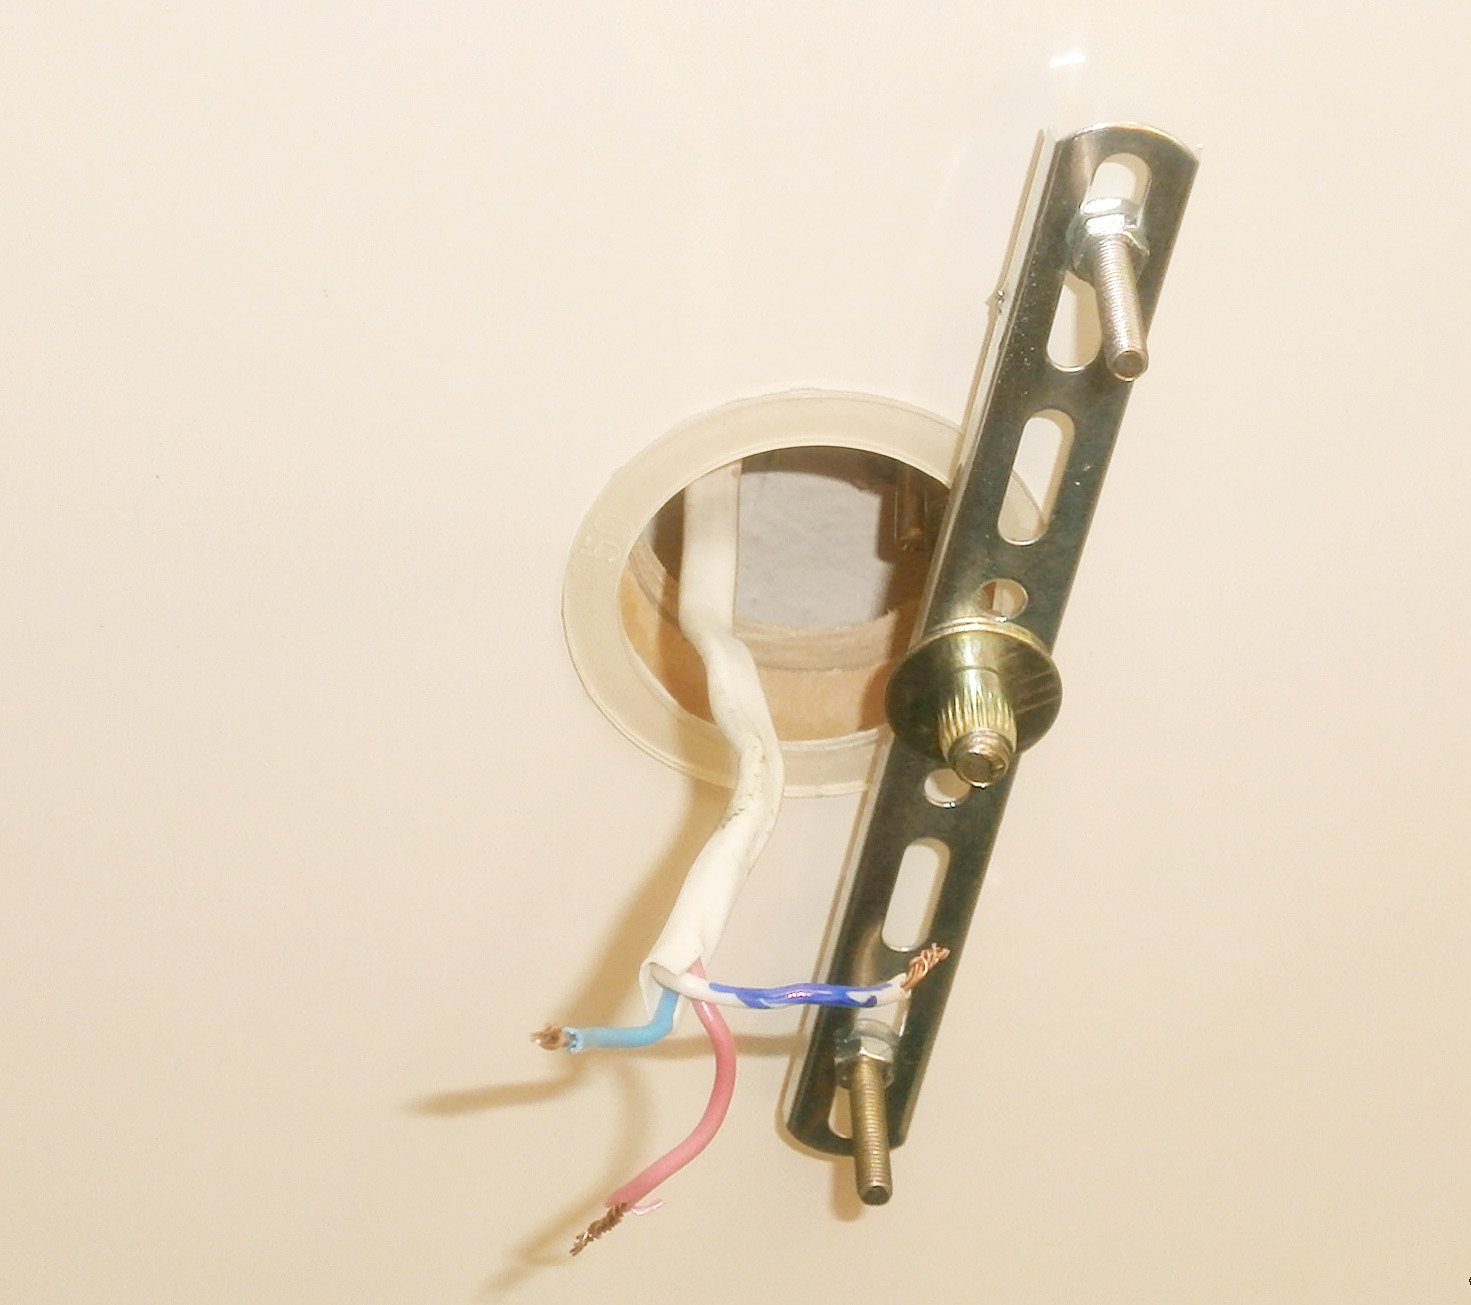
- Holes are drilled in the marked places, and with the help of dowels with screws, the bracket is fixed;
- After attaching it to the ceiling, check the availability of power and, when the light is off, connect the chandelier with the appropriate wires;
- There are protruding pins on the bracket on which the base of the chandelier fits. After that, nuts are screwed on them until the saucer is pressed tightly to the ceiling.
After checking the operability of the chandelier, plafonds and decor are hung on it.

How to hang a chandelier on a hook if the ceiling is concrete
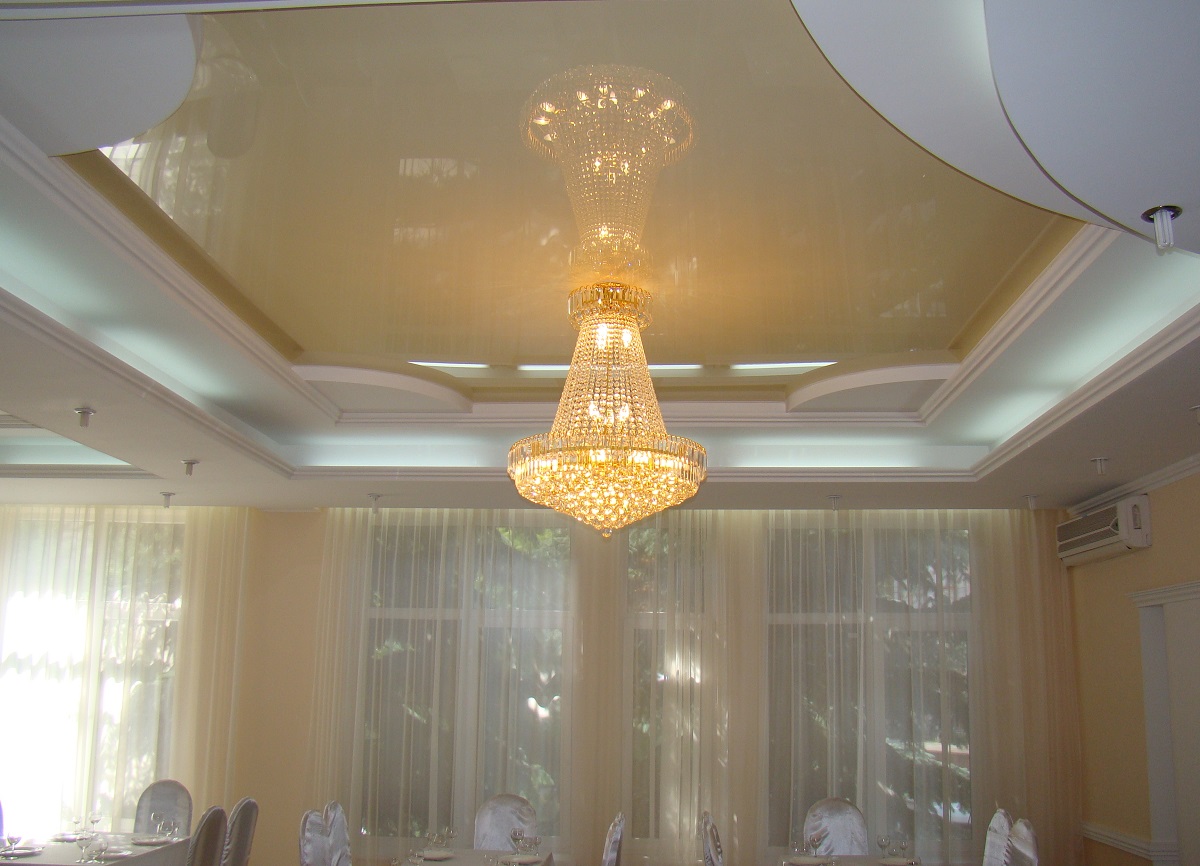
This type of fastening is advisable when hanging heavy chandeliers exceeding 5 kg in weight. In old houses, such hooks still remained, so it remains only to check their strength. To check, it is enough to attach a load to the hook whose weight slightly exceeds the weight of the lamp. If it does not begin to swing after a while, then the hanging lamp will be able to withstand. In new buildings, you will have to screw the hook yourself.
For this type of fastening, it is advisable to use an anchor bolt into which the spacer hook is inserted. Its design allows you to literally dig into the base material, reliably holding it there. Select a drill for the hole so that the anchor fits into it tightly, but without effort. It is tightened to the stop, due to which there is a spacer along the entire length of the dowel. To avoid trouble, the hook should be insulated. After that, the chandelier is hung on the hook and connected. To hide the installation site on the chandelier there is a camouflage decorative bowl.

How to hang a chandelier on a plasterboard ceiling on your own
The installation of the lamp is somewhat more complicated if it was previously decided to level the ceiling with drywall, because the chandelier cannot be hung directly on the drywall plate. To minimize work and possible damage it is better to use a hook. The general rules for installing the hook are the same as with a concrete ceiling, but there are a number of nuances:
- First, you must first form a hole in the skin. Its diameter is selected a little more than directly under the anchor, but less than the head of the hook;
- The plate is already drilled with a suitable drill under the anchor to a depth of 7-10 cm;
- The fixture is screwed into the anchor so that its tip is below the ceiling at a distance of 1-2 cm. A chandelier is hung on the hook, the cup is connected and fixed.
If the lamp is light, then it can be fixed to the profile with a bracket. However, it should be borne in mind that it is made of soft aluminum, so over time it will bend under the weight, deforming the ceiling.
Correct installation of a chandelier on a stretch ceiling
It is the most difficult to install a lamp on such a ceiling with your own hands, because the material is easily deformed during careless handling. Ideally, the fixture for the chandelier is installed before the installation of the canvas, you just need to choose its length correctly. To do this, a fishing line is stretched between the profiles, intersecting in the place where the chandelier will be hung.
When hanging it on a hook, the scheme is similar to installing an anchor when working with a plasterboard ceiling, but the top of the hook should be at the level of the lines. When installing the stretch ceiling canvas, it is necessary to stick a thermal ring at the place of installation of the chandelier, which prevents the spread of PVC material. Then, a hole for the hook is cut inside the ring. If the canvas has already been stretched, then the ring is first glued and a hole is formed. Then the hook is already installed in the main ceiling.
Next, consider how to hang a chandelier on a stretch ceiling using a bracket:
- Since the structure of the canvas is soft, it is necessary to carry out a little preparatory work before hanging the chandelier. In particular, on the main ceiling, it is necessary to attach a wooden plank, the thickness of which corresponds to the distance between the main and stretch ceilings. This can be done easily with conventional self-tapping screws with dowels. Previously, a hole is formed in the bar for the output of wires;
- The ceiling canvas is stretched and a thermo-ring is installed in the place of the fixture, inside which a hole is cut;
- Mounting plate is installed. Its fastening on the bar is carried out in the limit of the ring, in no case through the canvas, so that the material does not begin to spread;
- The chandelier is connected, mounted on studs and fixed with decorative nuts.
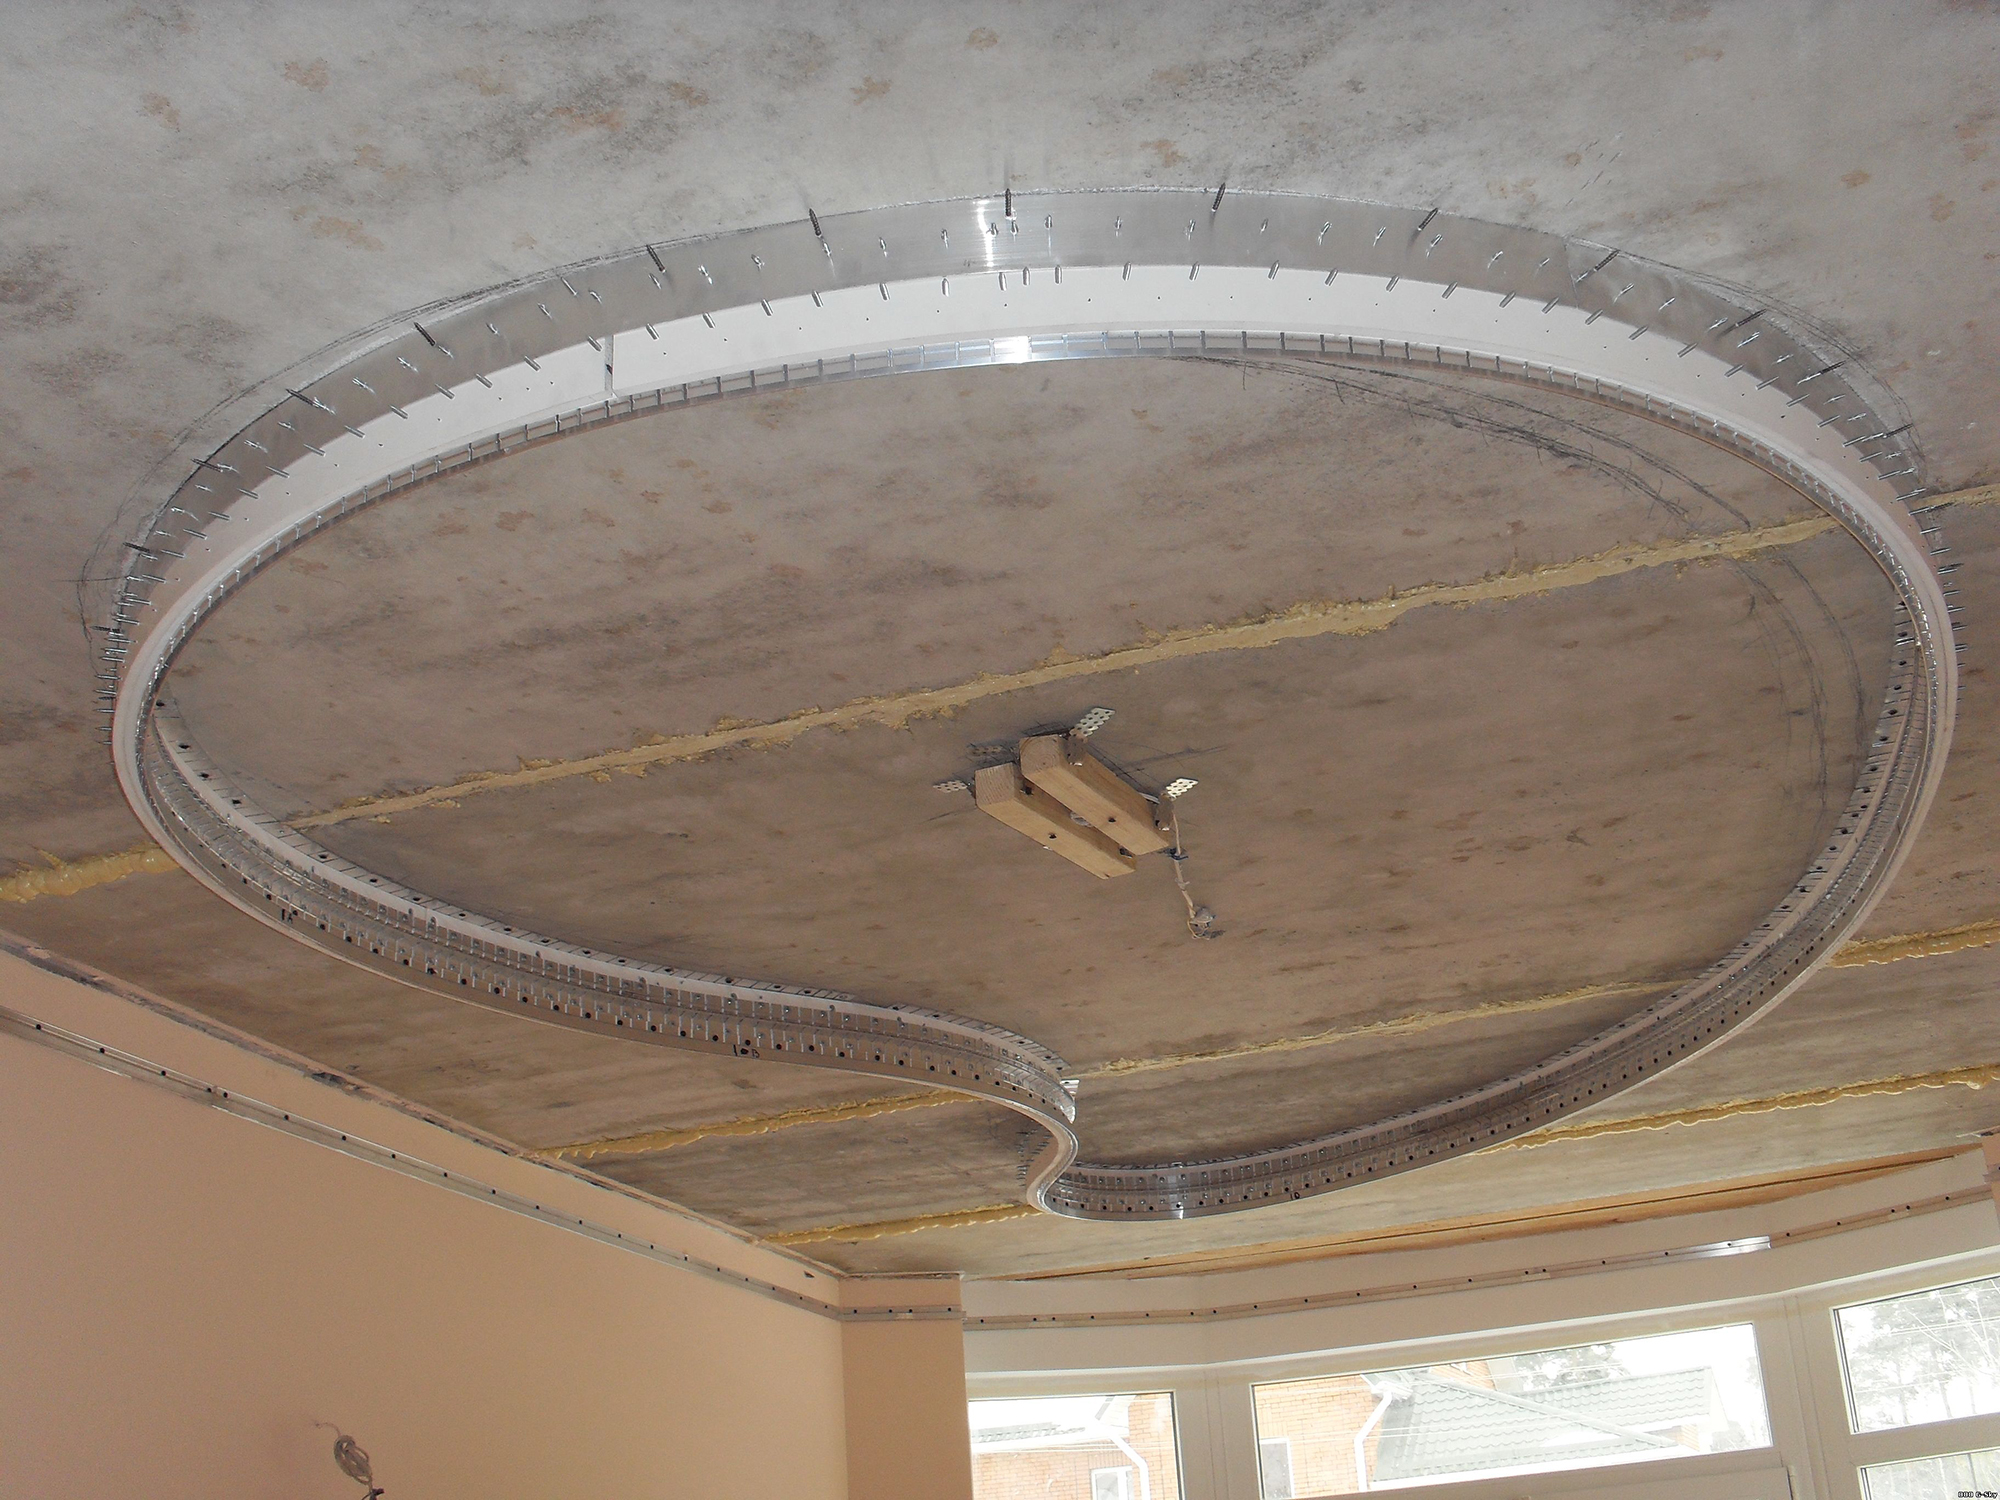
When using chandeliers with a wide base, which are often decorated with a remote control, a cross-shaped bar is used. Consider how to connect such chandeliers to the ceiling step by step:
- A platform corresponding to the size of the cross is formed from a sheet of plywood. It also needs to make a hole for the output of wires;
- In the corners of the platform, metal strips are installed. They are necessary for fixing the platform on the main ceiling;
- After installation of the canvas in the places of fastening of the crosspiece, thermal rings are fixed and holes are cut out. The crosspiece is attached to the platform with self-tapping screws;
- Next, the chandelier is attached to the bar. It is important to ensure that the base of the chandelier is parallel to the surface of the ceiling.
How to independently connect your lamp to the switch
First you need to decide how many wires come out of the ceiling, and how many keys are on the switch. If the chandelier is supposed to be connected with two wires, then the two-key switch cannot be used. In addition, you will have to pull another wire, but in this case it is easiest to connect the chandelier - just collect the wires of the same color into bundles.
If a chandelier with three wires, then the situation is a little complicated. First of all, you need to assemble the lamps in groups. The neutral wires of all cartridges are connected to a common zero wire. One remaining wire is connected to the first group of lamps, and the second to the second group. Be sure to turn off the power during connection. And not just a switch, but on the shield, because a qualified installer does not always lay the wiring. As a result, it is not the phase that breaks the power, but zero.
In this article, we examined in detail how to hang the chandelier yourself and connect it to the network. Subject to all the rules, this can be done without outside help. You can connect the chandelier only with complete confidence in a positive result, but it is still better to entrust this procedure to an installer with the appropriate level of qualification.